Friday, October 26, 2018

Go Glitter

Good morning.

We have a lovely new challenge over at Daring Cardmakers.

Svenja is our lovely host this weeks and the challenge is to use glitter on your creations.

Of course I just love my glitter and I had to make a Christmas card.

Glitter and Christmas are just a perfect pair don't you think?

I found hidden away in my craft stash some red glitter embossing powder so I just had to use this.

I love blue and red together on a Christmas card so I went with that.

I first blended two shades of blue onto some white card stock.  I then stamped in the same blue some snowflakes using the Snowflakes Sentiment set from Stampin' Up!


I waited for this to dry and gave it a blast with my heat gun just to speed up the drying.  I then added some more snowflakes but this time I used versamark ink and added the red glitter embossing powder and heat set this.

I love seeing the powder turn to liquid and with the added glitter it just makes it more lovely to watch.


I then die cut an oval and repeated the same process as above but this time I added a sentiment.
 I added this to my card using some foam squares for a bit of dimension.

I hope you can see the glitter as I found it a little difficult to photograph.

Thanks for stopping by today and please check out the blog over at Daring Cardmakers for more lovely glittery inspiration.


Wednesday, October 24, 2018

Ink Blending Workshop - Snow Scene

Welcome back and I hope you are having a lovely week.

I just wanted to share with you the second card the class made at our monthly workshop.

Everyone had lots of fun creating this winter scene.

To create the card I started with a piece of white card stock.  I then took a piece of copier paper and I just ripped it.  I placed the torn edge at the top of my card to act as a mask.  I then started to ink from the top using dapper denim and then I blended balmy blue over this.

I then moved my torn piece of paper a bit further down the card and inked very lightly with balmy blue to create a snow bank.  I then create a third snow bank in the same way.


Next I stamped the tree line in black ink.

Just take your torn edge and place it back where you have just inked and pull it down perhaps just a couple of millimetres this ensures that your trees are not floating.  I then used the lovely as a tree stamp set and stamped the row of trees over the mask to create the illusion that the trees are in a snow drift.


I then stamped the fir tree to the bottom right and added a greeting.

You could add glitter to the snow banks or wink of stella if you wanted to just to add that extra bit of Christmas sparkle.

Please pop over to the Stampin up Website for more details and when placing an order please add me (Dawn Barwick), country (France), address (St Hernin) as your demonstrator.

Products Used


Tuesday, October 23, 2018

30th Birthday Stampin' Up! Sale

The celebrations have started over at Stampin' Up! 

Come and grab a bargain.  15 % off selected stamp sets.


Check out the list below or head straight over the WEBSITE.

The sale ends tonight (23 October) at 10:50pm in the UK and France, Germany, Austria and The Netherlands at 11:50pm.

Have fun shopping.


Monday, October 22, 2018

Merry Christmas Makes #3


Hello everyone.  I hope you had a lovely weekend.

Merry Christmas Makes

Its project number 3 today using the Making Christmas Bright Bundle from Stampin' Up!

This time I made a very clean and simple card using just 3 stamps from the set.

To make the card I used a piece of white card stock and stamped the star wreath on the front using garden green first then I stamped it again using pear pizzazz.

Next I added some heat embossed stars and I also heat embossed the greeting at the bottom.

To finish the card I added a few sequins from my own stash.

It took longer to get the supplies out than to actually create the card.

A great card to make during the Christmas period if you have a million and one other jobs to do as this card took minutes to make.

Thanks for stopping by today and please check out the list below of the products I used.

Please pop over to the Stampin up Website for more details and when placing an order please add me (Dawn Barwick), country (France), address (St Hernin) as your demonstrator.

Products Used


Flash Sale Starts Tomorrow

Time for a party to celebrate the Birthday of  Stampin' Up!with a sale.

The sale starts tomorrow for just 24 hours and there is 15% off selected stamp sets.


Please click the link down the side of the blog tomorrow for a full list of all the stamps.

Don't forget the sale starts tomorrow for only 24 hours.

Have fun shopping and grab yourself a bargain.


Saturday, October 20, 2018

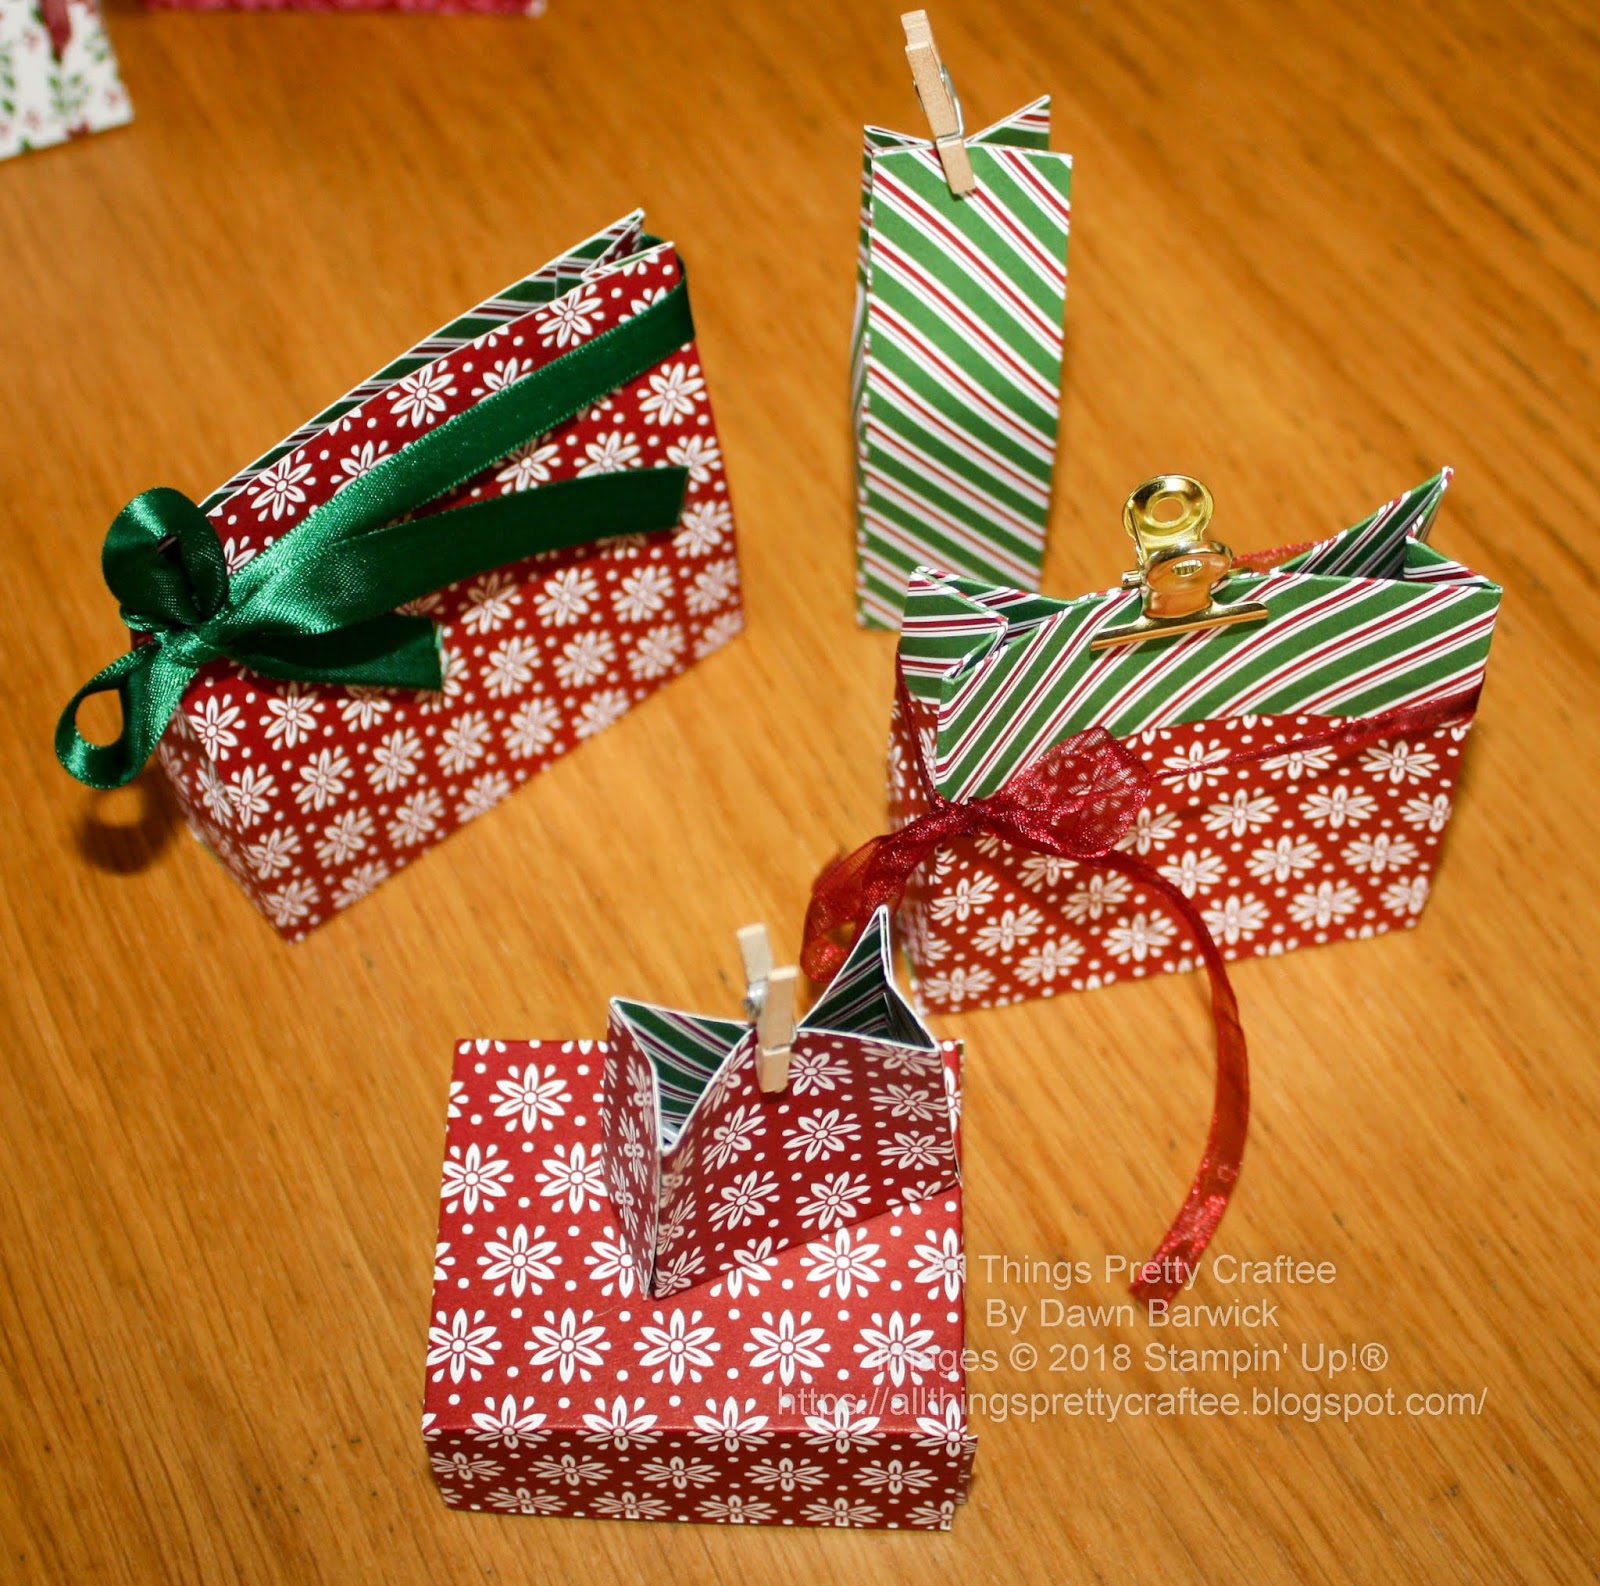
One Sheet Wonder Workshop

Hello everyone and I hope you are enjoying the weekend.

I just wanted to quickly stop by and share some photos of a workshop I held on Friday.

The class all made 5 bags/boxes from one sheet of DSP.

The lovely Sam Hammond of Pootles Papercraft has an amazing tutorial over on her blog.  Please check it out.


The class did an amazing job and look how festive the projects all look.

The boxes and bags are a great size for all kinds of yummy treats.

Thanks for stopping by today.

Please pop over to the Stampin up Website for more details and when placing an order please add me (Dawn Barwick), country (France), address (St Hernin) as your demonstrator.


Products Used


Friday, October 19, 2018

Apple Day

Hello Everyone.

I hope you have done lots of crafting this week.

Did you know that 21st October is Apple Day, so for this weeks challenge over at Daring Cardmakers Joanne our lovely host would like to see some tree fruit on your cards.  This could be apples, oranges, lemons etc...

I decided to use lemons.

I have this coffee and tea stamp set that I got free in a card making magazine and I hadn't used it.  So I thought how could I incorporate this stamp set with todays challenge.

Then I had a light bulb moment and I made the tea into lemon tea.  I am a tea drinker and I do like lemon tea especially in the summer.

To make the card I added some patterned paper to a card blank and layered a piece of white card stock over the top and allowed a border.  I then distress the edges and added a little bit of Tim Holtz Tea Dye Distress Ink.

Next I stamped the coffee/tea stain rings in the bottom corner as I wanted the tea cup positioned just over the top.  I then added a little greeting.

Next I stamped the tea cup onto some patterned paper and paper pieced the tea inside and coloured this in.

I then die cut the slice of lemon from a Spellbinders die called Make Mine A Lemon and inked the edges slightly.  I also added the little flower from the same set to the edge of the saucer.

I finished the card with some die cut steam which also came from the magazine freebie.

Thanks for stopping by today and please check out the creations from the Design Team over at Daring Cardmakers.  

Come and join in the fun.

Wednesday, October 17, 2018

Ink Blending Workshop - How to create a reflection

Hello everyone.

Todays post is about the amazing workshop I held last week with a very talented group of crafters.

We all made inky blended backgrounds with snowy scenes and we also tried the reflection technique.

For todays post I thought I would start with the reflection technique.


To create the card I started with a piece of white card stock and started with blending balmy blue at the top.  Next I used highland heather, pear pizzazz and then for the pool of water I used pool party. All these inks are from the subtles collection.

When inking the background take into consideration where you stamped image will be placed in order to blend the ink in the right places.  As I inked the background I placed the stamp alongside to check the position.


Next I stamped the row of trees using black ink.  

To create the reflection take a piece of window sheet/acetate and stamp the image onto it.  Then turn it over and line the image up with what you have already stamped.  Next lightly rub your finger over the window sheet like you would if you were applying a transfer.  

The image will transfer onto your inked background but a touch lighter which creates a sort of reflection.


I then finished my card with a little sentiment strip.

Thanks for stopping by today and I hope you enjoyed this technique.

Please pop over to the Stampin up Website for more details and when placing an order please add me (Dawn Barwick), country (France), address (St Hernin) as your demonstrator.

Products Used